# Connecting Your Deployed Frontend, Backend and MongoDB Atlas Database
*This post was written back in the days where Heroku provided free hosting; do not expect any example projects or links to Heroku to work.*
> Important things to note: you must restart your server anytime you change an environmental variable in your .env file. Also, for React apps made with `create-react-app`, you must prepend all of your custom environmental variables with `REACT_APP_`
In my previous posts, I outlined how to [deploy a Node / Express server backend to Heroku](https://blog.benhammond.tech/deploying-a-node-express-backend-to-heroku) , and how to [deploy a React app to a separate Heroku app](https://blog.benhammond.tech/deploying-a-react-app-to-heroku). Both of those steps helped us to get most basic "Hello World" version of our client and server apps up and running and connecting to one another. As we add complexity to our apps (OAuth, JWT token authorization, database integration, etc), we will need to do some more work to make a fully deployed version of our web application.
## Step 1: Setting Up Local Environmental Variables (which are properly ignored by git)
To get everything running in development, you'll need to properly configure your _environmental variables_. Locally, this is done using two distinct `.env` files, one for our frontend app and one for our backend. **Before you create your .env files, be sure that both of your app's git repositories include `.gitignore` files, and that each ignore file contains the following on its own line: `.env`.** This will make sure that your environmental variables don't get committed, avoiding the potential of sharing sensitive information on a public GitHub project.
### For Local Frontend
Here is my frontend .gitignore file; notice it is also telling git to ignore all sorts of annoying or unnecessary files, such as our node modules and `.DS_Store` goobers.
```
# See https://help.github.com/articles/ignoring-files/ for more about ignoring files.
# dependencies
/node_modules
node_modules
/.pnp
.pnp.js
# testing
/coverage
# production
/build
# misc
.DS_Store
.env
images/.DS_Store
.vscode/
npm-debug.log*
```
If your .gitignore file is set up properly on the floor of your repo, VSCode will visually grey out the ignored files and folders:
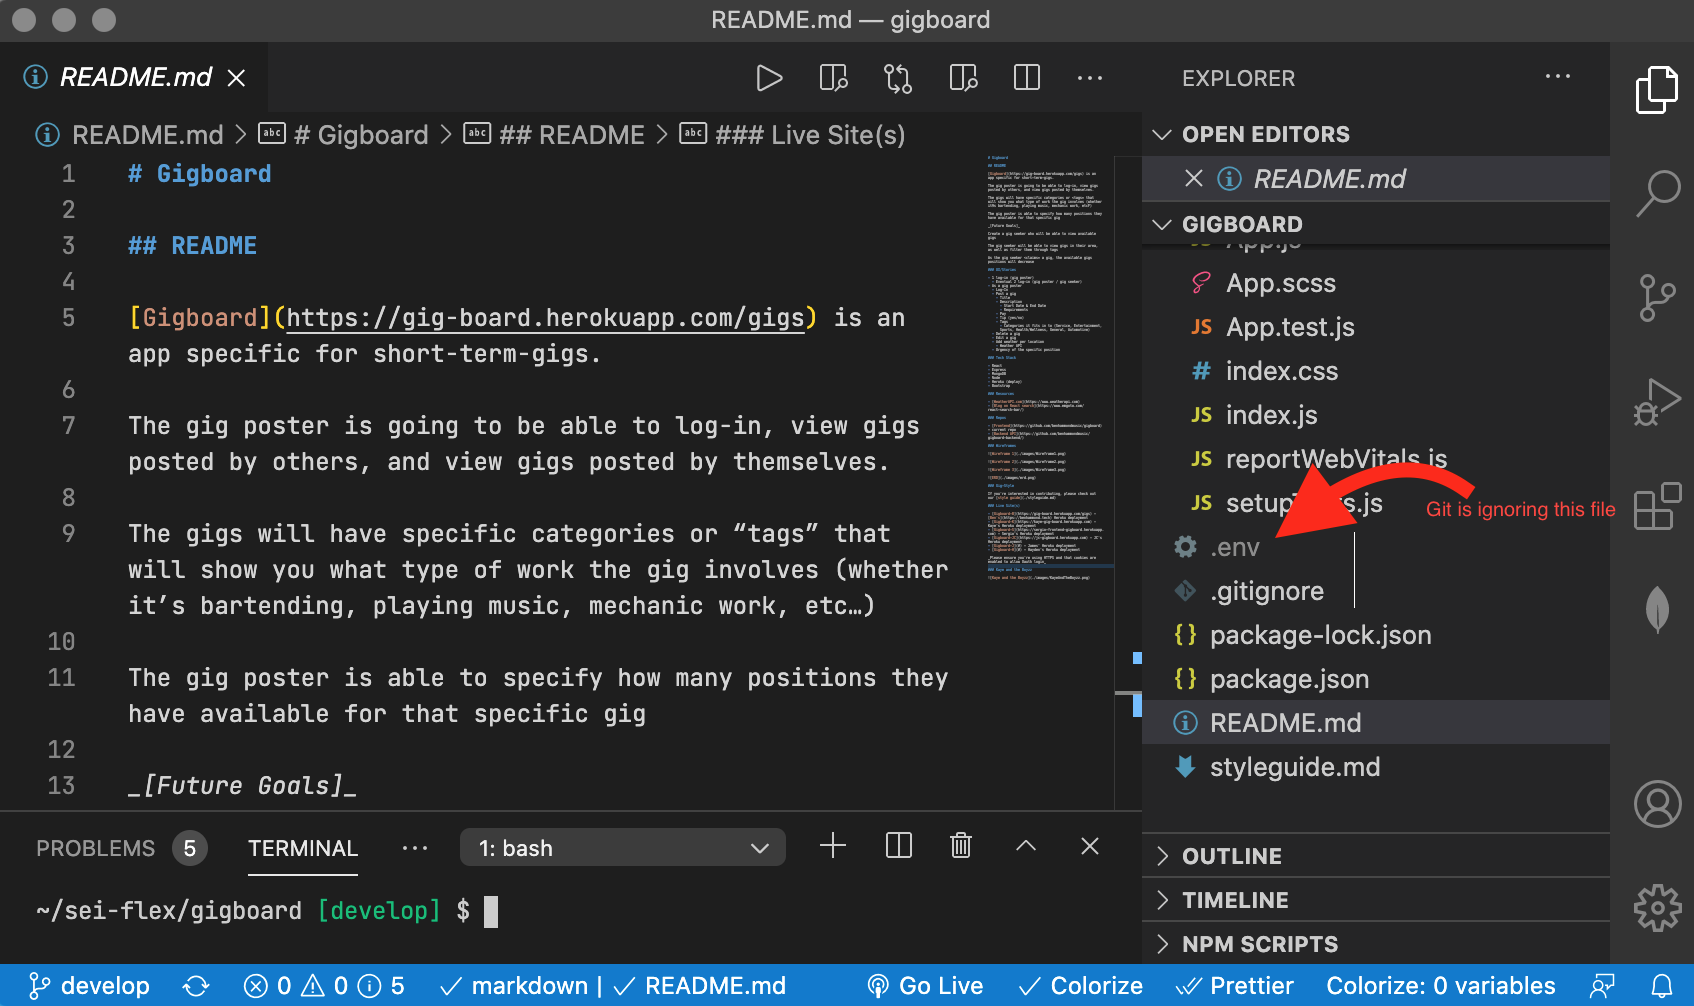
In the front end, React will automatically read in any variables you assign in your .env file, but you _must_ append your variable name with the string `REACT_APP_`. For example, we are using `REACT_APP_API_URL=http://localhost:5000` to tell our local front end the location of our local backend. We would not be able to use `API_URL=http://localhost:5000` in our React app; because React's build process requires that prepended string. The only exception to this naming convention are the built in environmental variables `NODE_ENV` which will return "development" on your local machine, and also `PUBLIC_URL`. Every other variable you store in a React app .env file must start with `REACT_APP_`.
Note: The reason we want it in an .env file isn't because it's some big secret, but because this backend address will be different for a deployed, production build of our app on the internet, vs. the current version which is living exclusively on our own computer. In fact, anything stored in your frontend .env, like anything that get's served to the client at all, should be considered public. **Private information like API keys, passwords, etc should never be stored in a React front end env file.**
### For Local Backend
Same process as above, however if it's simply a Node app as your backend, you won't include the `REACT_APP_` to start any of your variables; you can name them whatever you want, but convention is to use SCREAMING_SNAKE_CASE. Also, (correct me if I'm wrong in the comments) since this is a backend server, these pieces of information can be considered secure, and this would be the appropriate place to store sensitive data or API keys.
### Locally Reading Environmental Variables into Your Code
The process of extracting the variable data _from_ your .env files _into_ your code is basically the same in your front and back end; you simply use `process.env.YOUR_SPECIAL_VARIABLE_NAME` anywhere in the code that you'd like to reference that value. In our code, whenever we need the front end to access the backend (like in an Axios GET request), we use `process.env.REACT_APP_API_URL`. Here is an example from our code where we are sending a `GET` request to the backend and expecting a list of all available gigs in return:
```
static all = () => {
return axios.get(`${process.env.REACT_APP_API_URL}/api/gigs`);
};
```
Notice we are using string interpolation as well, inside of the back-ticks. We can inject a variable into the middle of the string using ```${variableNameHere}```. That isn't part of the .env process per se, but is a nice way to create a string that includes hard coded data alongside environmental variables.
For your Node backend, you must install a package called dotenv ```npm i dotenv```, and then the exact same command will work: `process.env.YOUR_BACKEND_VARIABLE`. Also note that since this is not a React app, there is no need to prepend `REACT_APP_` to your .env variable names.
## Step 2: Connect everything _locally_
> Big picture: your **local frontend** needs to know where to make calls to your **local backend**, and your **local backend** needs to know where to make calls to your **local database**.
For our app, this is what each of your .env files should look like:
```
# FRONTEND .ENV FILE
# tells frontend where the backend is running
REACT_APP_API_URL=http://localhost:5000
# secret key to access weather API, you'll have to sign up and get your own
REACT_APP_WEATHER_API_KEY=123456789
```
Please note, you will need to replace `123456789` in the weather API key with an actual, working key, which you can obtain for free at [Weather API](https://www.weatherapi.com/)
```
# BACKEND .ENV FILE
# mongo db local (only used in development)
DATABASE_URL=mongodb://127.0.0.1:27017/gigboard
# secret key needed for JWT authorization; that number isn't the real key
SUPER_SECRET_KEY=123456789
```
## Step 3: Fire It Up (Locally)
Make sure your backend is running (using `nodemon` or `heroku local web` for example), and launch a browser to your local backend port to confirm that it's working. In our app the backend runs locally on [port 5000](http://localhost:5000). We've coded in a helpful little message for our backend, so you should see this:
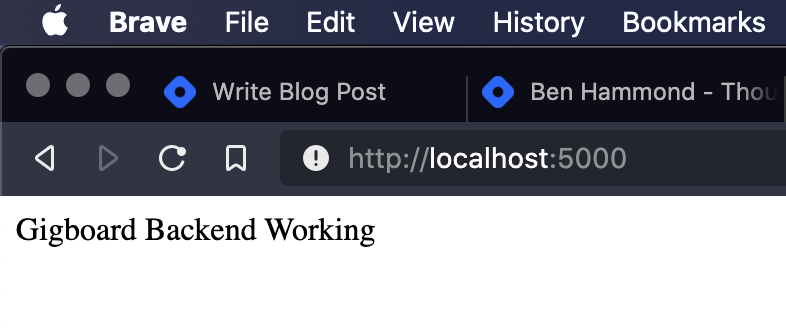
You should also see a connection message in your terminal, wherever you started up your backend server. It should read: `Connected to MongoDB at...` and have the location you assigned earlier in the backend .env file. Make sure you check THIS terminal for any `console.log()`s that you are trying to use for your backend code; they will not appear in your browser's dev tools log.
Next, confirm your React app is alive and kickin'. You'll likely want to launch this with `npm start` and your browser should automatically open to the standard create-react-app [port 3000](http://localhost:3000). It defaults on my machine to Chrome, despite me having set Brave as my default browser; I will investigate and follow up with a blog on fixing this sometime soon. If all has gone well, you will have a fully functioning development version of the app, and it should look somewhat like this (yes, that's me rocking out on my guitar, thanks Kaye!):

> Now that we have all three pieces running locally (frontend, backend and database), we will migrate one chunk at a time into the cloud. I made the mistake initially of trying to deploy all three pieces at once, and debugging issues with deployment is difficult enough I'd recommend going step by step so it's easier to pinpoint and diagnose the issue.
## Step 4: Connect Your Local Fullstack App to a Deployed Database
Due to the shared resource nature of our app, our group shared my personal MongoDB Atlas database. I won't be posting my actual link here, but this is how to set it up. Currently, your _local_ backend is using the value in your .env file to access the _local_ database. To use the deployed database instead, you just need to change your local backend .env file. I like to keep the local database key in place and simply comment it out with a `#`, so I can easily switch back and forth as needed. So now, our local backend .env will look like this:
```
#LOCAL BACKEND .ENV
# mongo db local (only used in development)
#DATABASE_URL=mongodb://127.0.0.1:27017/gigboard
# deployed mongo (used for production)
DATABASE_URL=mongodb+srv://{{{GET_YOUR_REAL_LINK_FROM_MONGODB_ATLAS}}}
SUPER_SECRET_KEY={{{YOUR SECRET}}}
```
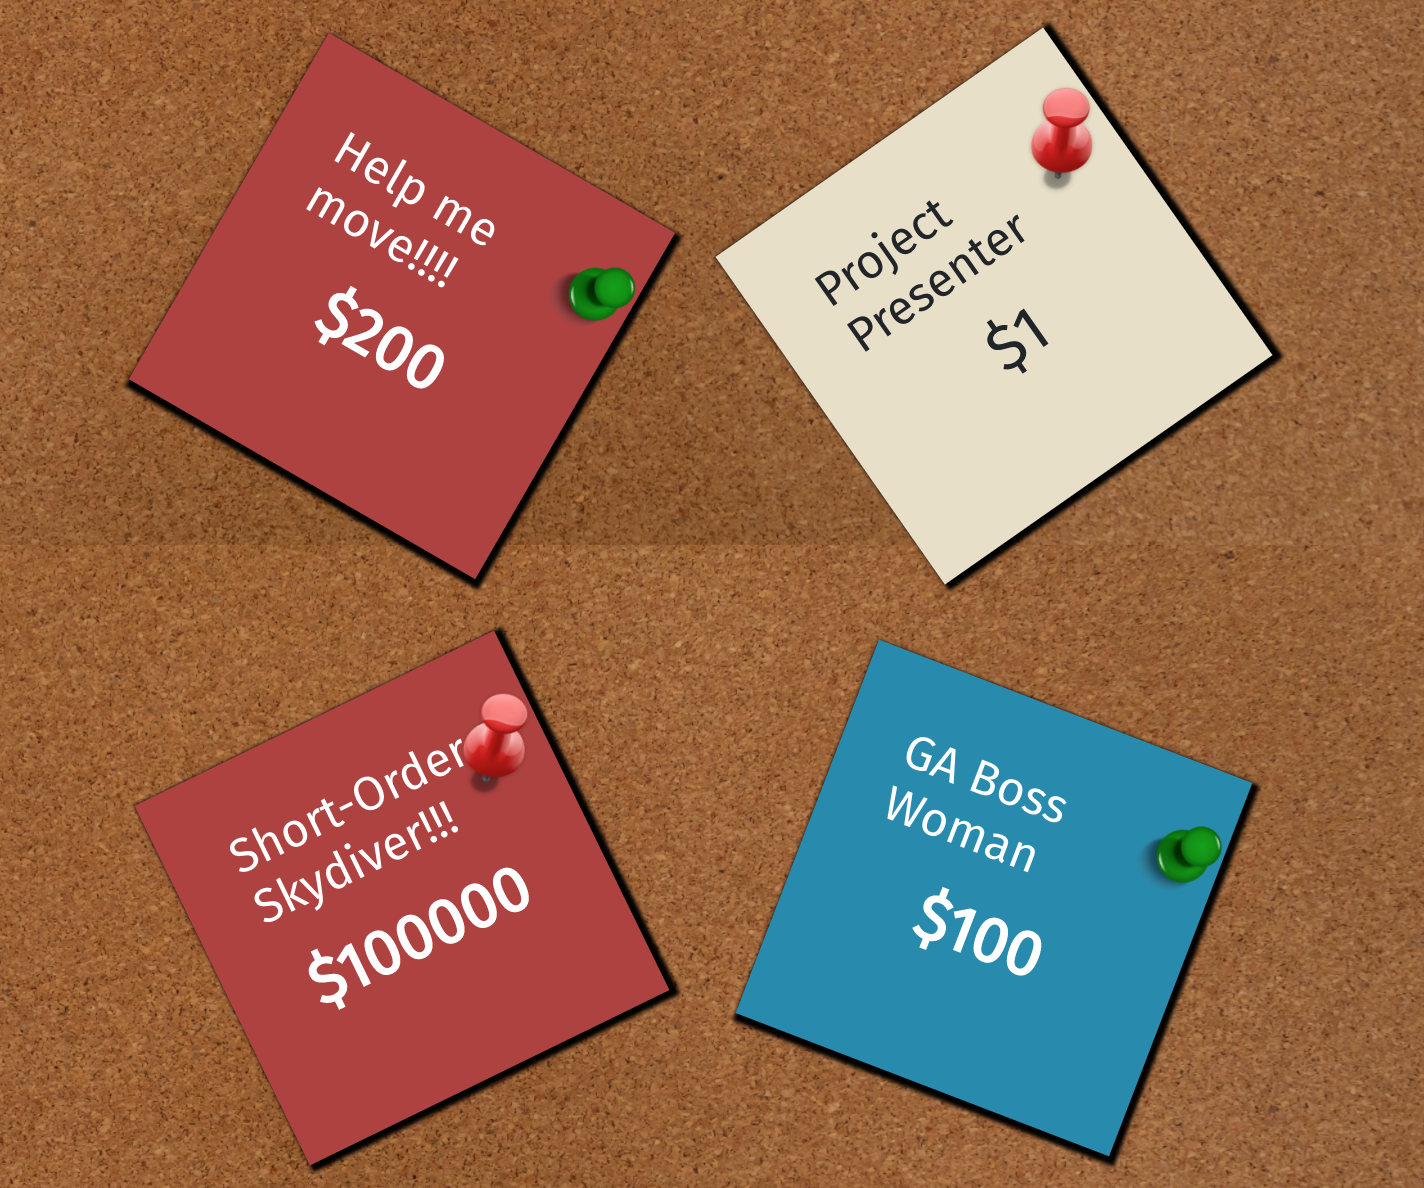
Now when you run your local frontend at [3000](http://localhost:3000/), you should be seeing cards from all of the group members who have also connected to this shared database:
> Note, I was having an issue at first getting this working; it turned out it was because my MongoDB Atlas had been inactive for quite a while and has gone dormant. To start it back up, I needed to [use the mongo shell in my terminal](https://docs.atlas.mongodb.com/mongo-shell-connection/) and manually connect and resume (I think.... not sure if this was totally necessary but it seemed to do the trick!)
## Step 5: Update Your Deployed Backend to Use the Deployed DB, Connect Your Still-Local Frontend
It's important to note that whenever you deploy, the .env **does not** get deployed along with the rest of the app. Instead, Heroku offers **config vars** which are the production equivalent of your local .env files. You must manually set up your config vars in Heroku; one easy way is to open up a new browser and:
- Head to your deployed backend project on your [Heroku dashboard](https://dashboard.heroku.com/apps)
- Click on "settings"
- about halfway down the page you'll see a section titled "config vars"; inside that section click "Reveal Config Vars"

- inside the first `KEY` field, copy and paste your variable name from your local backend .env, in our case `DATABASE_URL`
- in the corresponding `VALUE` field, paste the link URL for the shared, deployed database. If you are setting up your own deployed database, MongoDB Atlas will provide you with the long URL and also some sample code. For reference, ours starts with `mongodb+srv://gigboard-...`
- you'll also need to be sure you copy your `SUPER_SECRET_KEY` and its value from your backend .env into another entry in these backend config vars
Now that the config vars are in place, you can deploy (or redeploy) your backend to Heroku. Assuming you set everything up using my [previous guide](https://blog.benhammond.tech/deploying-a-node-express-backend-to-heroku), you'll want to be sure you `git pull` your main branch (or whatever you're using for production code), and then use `git push heroku main`. I explained this more in my previous post, but basically you have two remote repos hooked up now: `origin` which points to your GitHub repo, and `heroku` which points to your production repo on Heroku.
Lastly, you'll need to temporarily change your front end .env file to find the backend at this new deployed address:
- open up your front end repo in VSCode
- open up the .env file
- comment out the existing REACT_APP_API_URL and add your deployed backend Heroku address instead. Again, like the database link, this is helpful to be able to switch back and forth easily between connecting to development or production. So the .env will look like this:
```
#FRONT END .ENV (temporarily connect to your backend server)
# local (development) backend api server address
# REACT_APP_API_URL=http://localhost:5000
# deployed (production) backend api server address
REACT_APP_API_URL=https://ben-gigboard.herokuapp.com
# get your own real API key
REACT_APP_WEATHER_API_KEY=123456789
```
Loading up [3000](http://localhost:3000) shouldn't appear any different now; it's simply using your deployed backend instead of your local backend to access the same deployed database. But if it works, there's only one step left!
## Step 6: Finalize by Deploying Your Frontend and Connecting the Backend
- in your browser, go to your _frontend_ [Heroku](https://dashboard.heroku.com/apps) project
- follow the same process as before clicking "settings" then "show config vars"
- make sure the entries there include the URL for your _deployed_ backend, and you'll also need to include your weather API key as well. Ours looks like this:
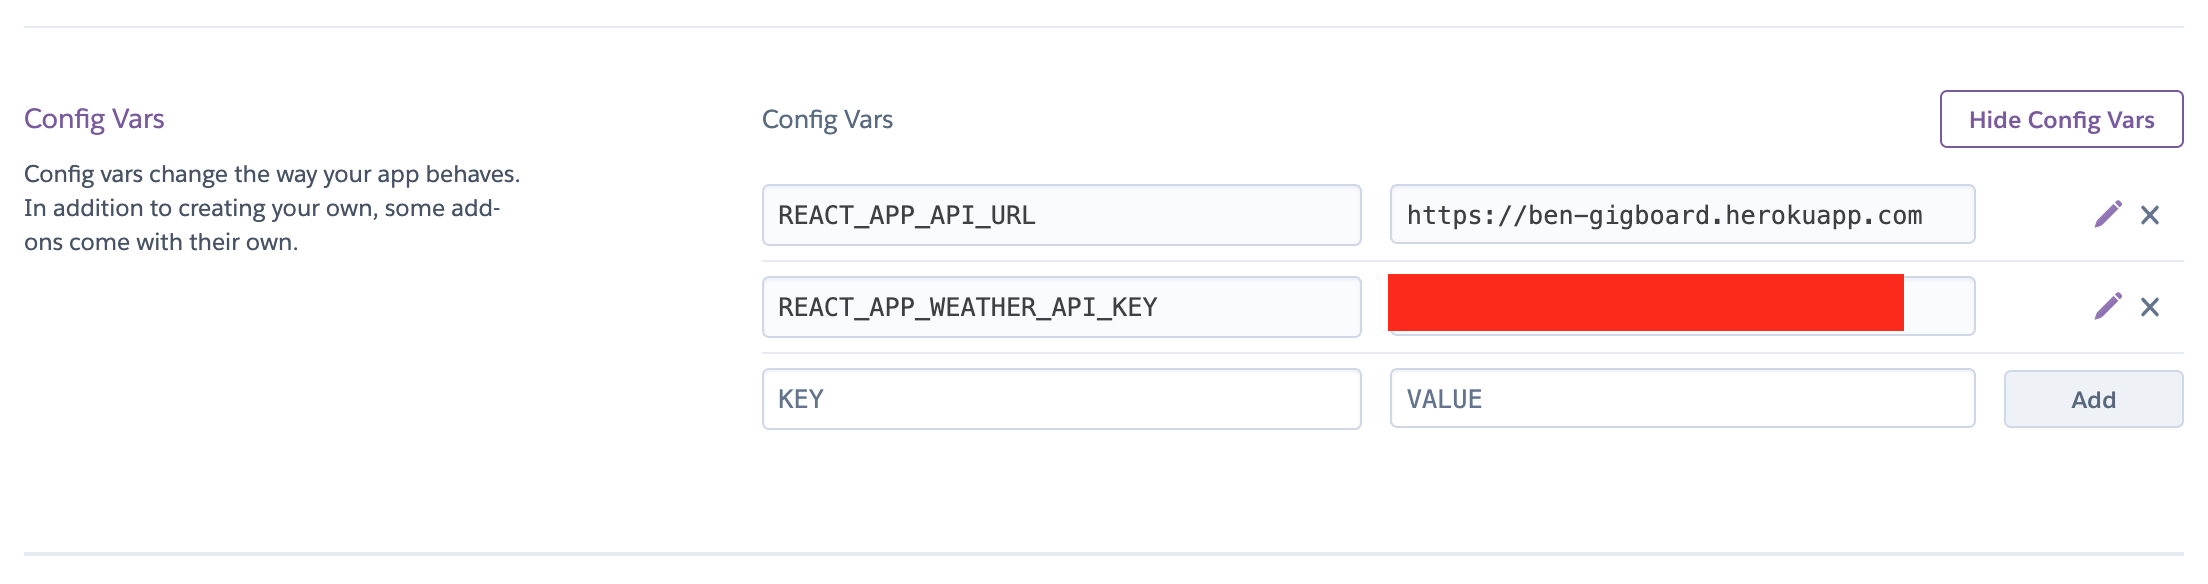
> Be sure you don't include the trailing slash on your URL; this is easy to accidentally do if you are copying/pasting the address from your browser's address bar. To clarify, the `VALUE` field should look like this:
```
https://ben-gigboard.herokuapp.com
```
> but **not** like this: ```https://ben-gigboard.herokuapp.com/``` <- _this will break_. We finally debugged this using the Chrome dev tools and noticing our frontend was making requests the the backend at **https://ben-gigboard.herokuapp.com//api/gigs**. Can you spot the error? It took us a while too.... it's the double forward slash before `api/gigs`.
Again, assuming you setup your frontend Heroku deployment using [my previous guide](https://blog.benhammond.tech/deploying-a-react-app-to-heroku) :
- in terminal in your frontend folder, switch to your production branch (for us it's `git checkout main`)
- pull down the up to date production code from GitHub: `git pull origin main`
- git add and commit
- push your front-end to production: `git push heroku main`
> You may get a git error saying you couldn't push because the remote Heroku repo had changes not reflected on your current repo. That's fine; I just took the error message's advice and used `git pull heroku main` to align everything, fixing up merge conflicts if needed. Remember, whenever you resolve a merge conflict to **save** the file, and then **add** and **commit**!
### Enjoy!
Well, that's it! Personally, having a fully deployed app, particularly one with a shared, deployed database, is really fun and makes it feel like "the real thing"! You can text the URL to your friends and show that what you've made, and even let them contribute to app's data points! I ran into MANY MANY more errors deploying, and found that the most frustrating part was the time needed to wait for deployment before checking for issues. Then, upon failure, it's far more difficult to figure exactly what the issue is, since Heroku's logs are much more difficult to decipher than when using console.log locally. I relied heavily on `heroku logs --tail` as suggested by the **your deploy failed** page that pops up. Several times I also connected directly to my Heroku file system in terminal using `heroku run bash`; this was extremely helpful just to verify which files had actually made it onto my server. I then used the `cat` command to display the contents of the files, just to confirm the correct versions had been pushed. This is actually how I was able to diagnose [the problem behind changing capitalization of your committed files](https://blog.benhammond.tech/dont-change-the-capitalization-of-your-filenames) .
Going forward, I will attempt to save my error messages and quick notes about resolving them to later include in my blog posts; I think it will be helpful in getting my solutions to those who are experiencing similar issues, and of course will make it easier to find my own solutions when I inevitably google the problem next time haha. Thanks for reading... hope it works!!